For my latest intarsia project, I wanted the color pattern to extend all the way to the cast-on edge. The trouble was, I knew either how to make the color changes as straight lines, or how to make a neat cast-on edge, but not how to get both at the same time.
I could make straight lines of color if I cast on each color separately, but that made for a scrappy edge:
The Twisted German cast-on, used here, was the neatest I found when adding colors separately.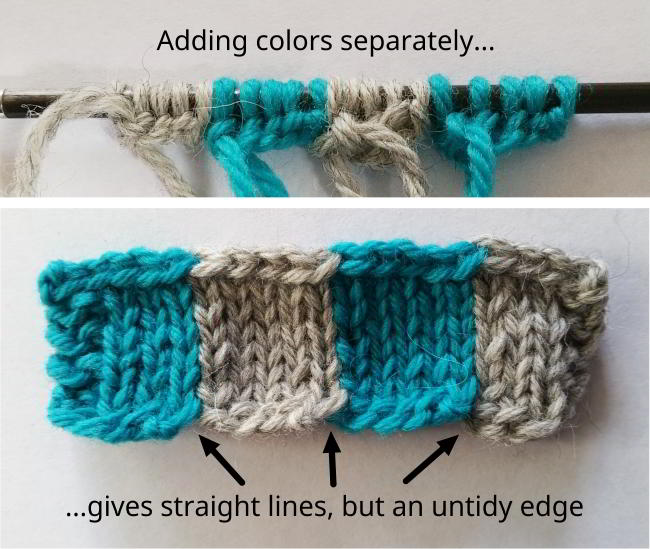
Or I could make a neat, continous edge if I used a cable cast-on, but the colors at the edge were out of line with those above:
Here I've joined the new colors just as I would in stockinette stitch.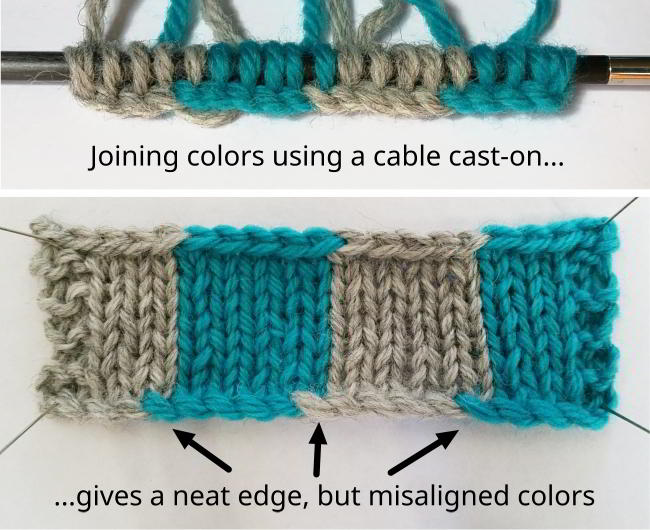
First swatch for my project
I decided I preferred a neat edge over perfect vertical lines of color, so swatched for my new sweater project using the cable cast-on.
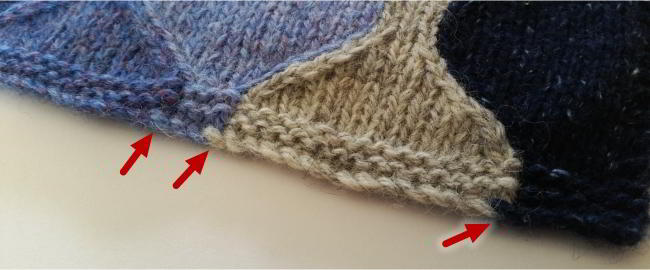
But it was no good, that dash of color sitting out-of-line at the cast-on edge annoyed my inner perfectionist too much—I had to see if I could get the best of both worlds.
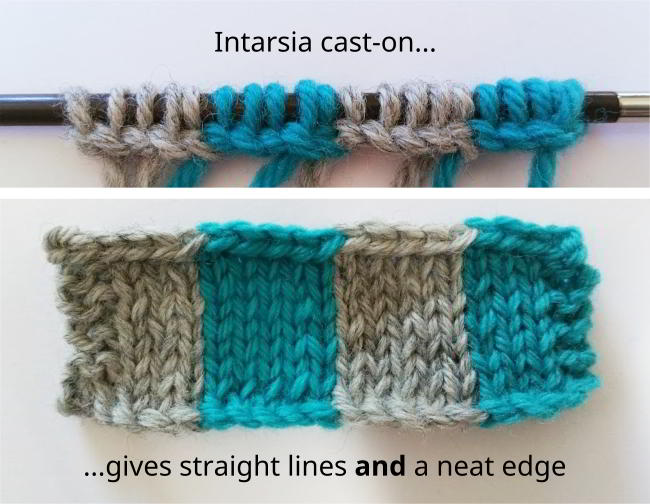
And it turns out I could!
I'm not sure if I've invented or just re-invented this method for casting-on in intarsia, but either way, I couldn't find anything like it with a Google search, so thought it was worth sharing.
The Intarsia Cast-on
Here's how to do it (I've also made a video).
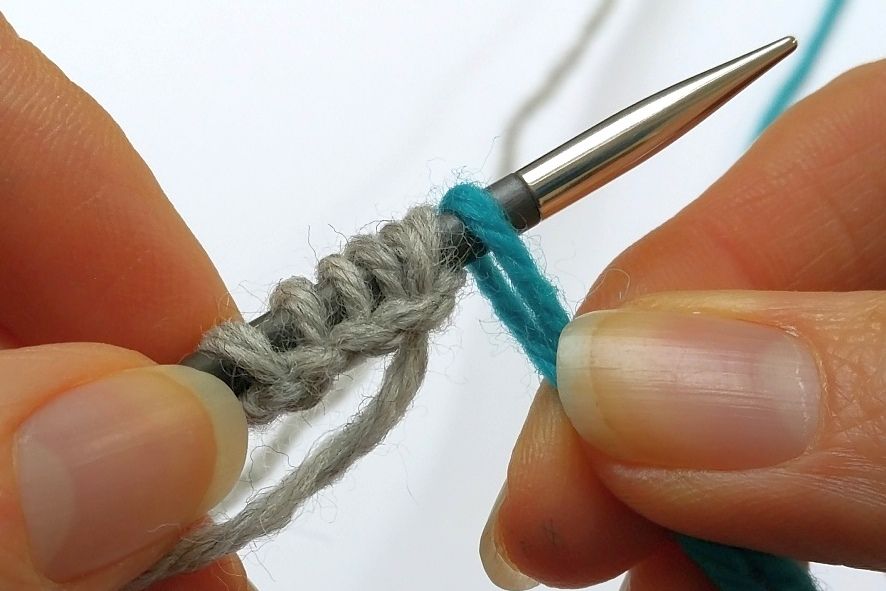
1. Using the cable cast-on, cast on the number of stitches you need for your pattern plus one more. So here I've cast on 6 stitches because I want to end up with 5. Make a loop near the end with the next color of yarn and place it over the left needle.
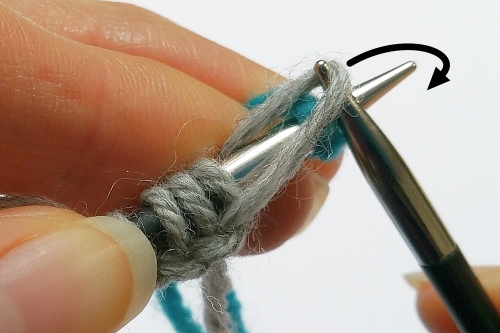
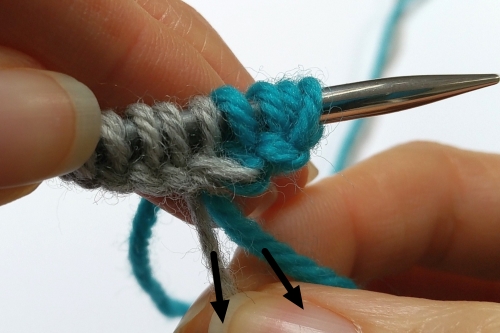
2. Clamp the new loop of yarn in place with the fingers of the left hand, and use the right needle to take the final stitch in the first color over the top of the new loop and off the left needle.
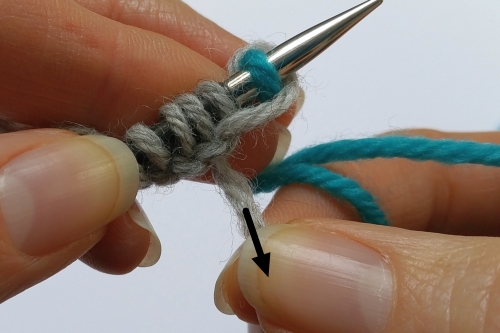
3. Pull on the old color yarn to shrink this loop which is now joining the two colors together.
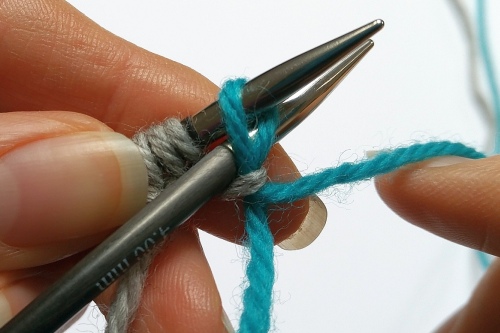
4. Insert the needle behind both legs of the stitch in the new color (just as normal for a cable cast-on) and continue to cast on in the normal way. Repeat the process for as many colors as you need to cast on.
5. Before working the first row of knitting, tidy the joins by pulling on the two yarns hanging from the back.
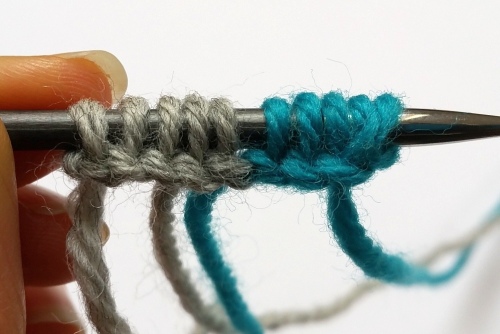
6. A neat cast-on edge, with colors that will be perfectly in line with the rows above.
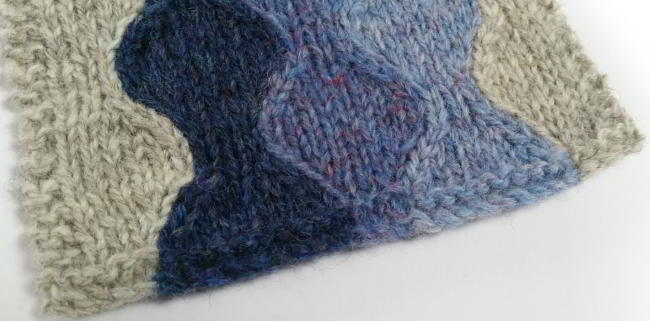
Second swatch
I was much happier with the cast-on for my second swatch!
If you try the intarsia cast-on, let me know how you get on—find me on Instagram, Ravelry and Facebook.
—Wendy
P.S. If you haven't yet signed up to our Yarn Geeks newsletter, use the form below!